In Windows 7 and previous versions of Windows, one had to use third-party software in order to mount an ISO or IMG file. Luckily, both Windows 8 and Windows 10 support mounting ISO and IMG files out of the box, meaning you can now mount ISO and IMG files without having to install third-party applications.
Mounting an ISO or IMG file is extremely easy in Windows 10. You just need to right-click an ISO or IMG file, and then click Mount option to see the contents of the ISO or IMG file in File Explorer. To unmount the ISO or IMG, simply right-click on the mounted drive in This PC, and then click Eject button.

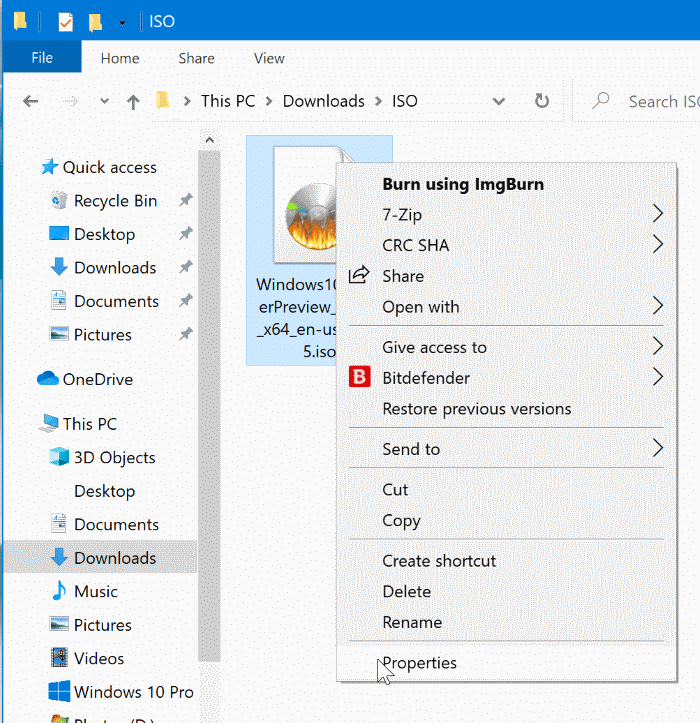
Although the Mount feature works without any issues, at times, you might not see the Mount option when you right-click on an ISO or IMG file. This happens when the Windows Disc Image Burner is not the default program for ISO or IMG file types.
If the Mount option is missing from the context menu in Windows 10/8, complete the below-mentioned directions to restore it with ease. The procedure is similar to the one we used to fix the Burn ISO option missing from the context menu.
Method 1 of 3
Add the missing Mount option to context menu in Windows 10
Step 1: Open the File Explorer and navigate to the folder containing ISO or IMG file. Right-click on the ISO or IMG file and then click Properties to open the Properties dialog.
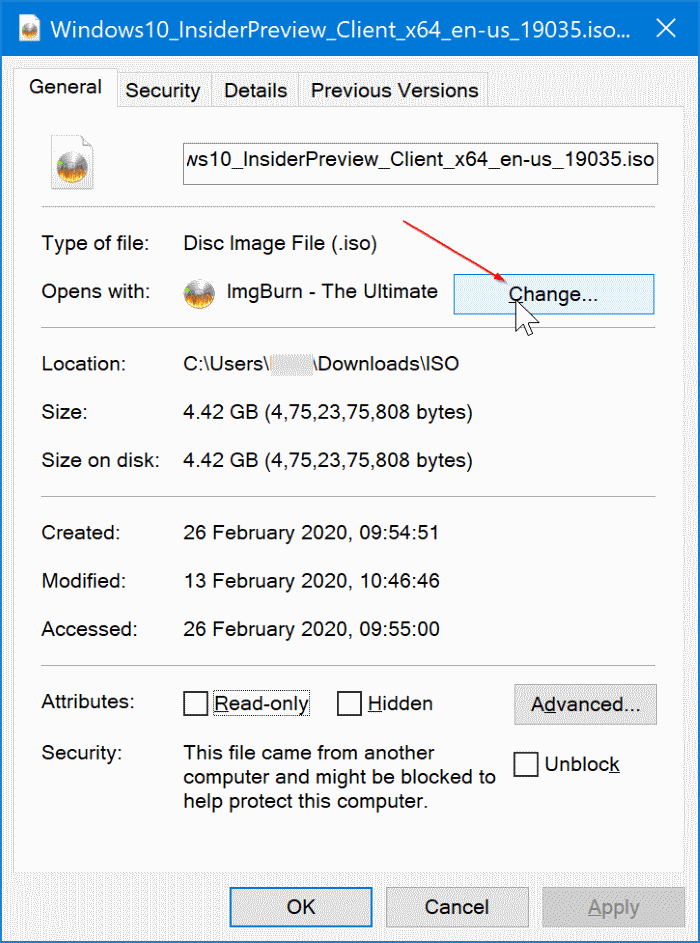
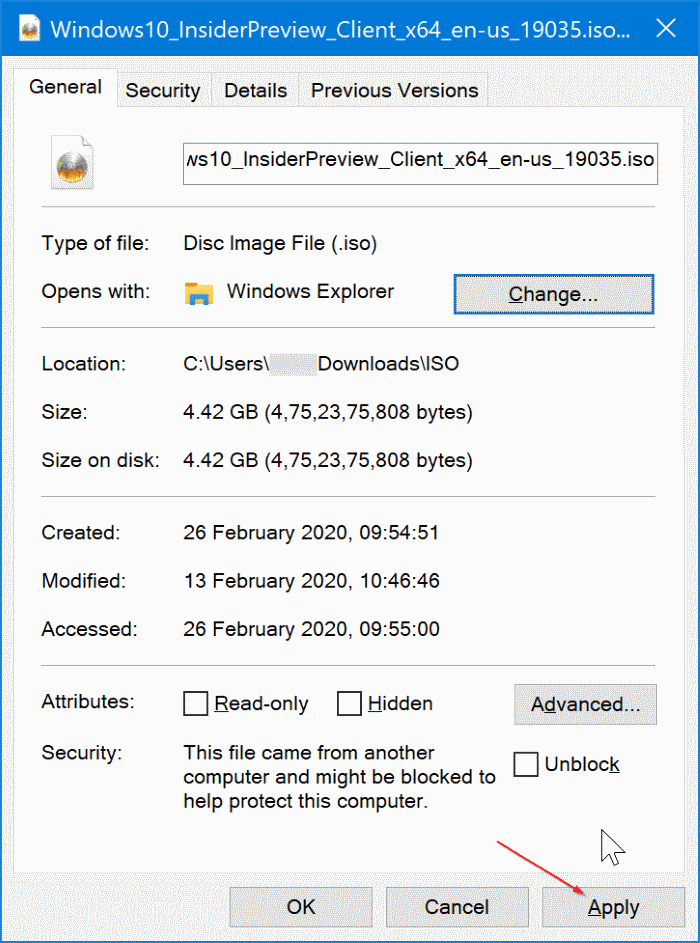
Step 2: Here, click the Change button next to the Opens with option.
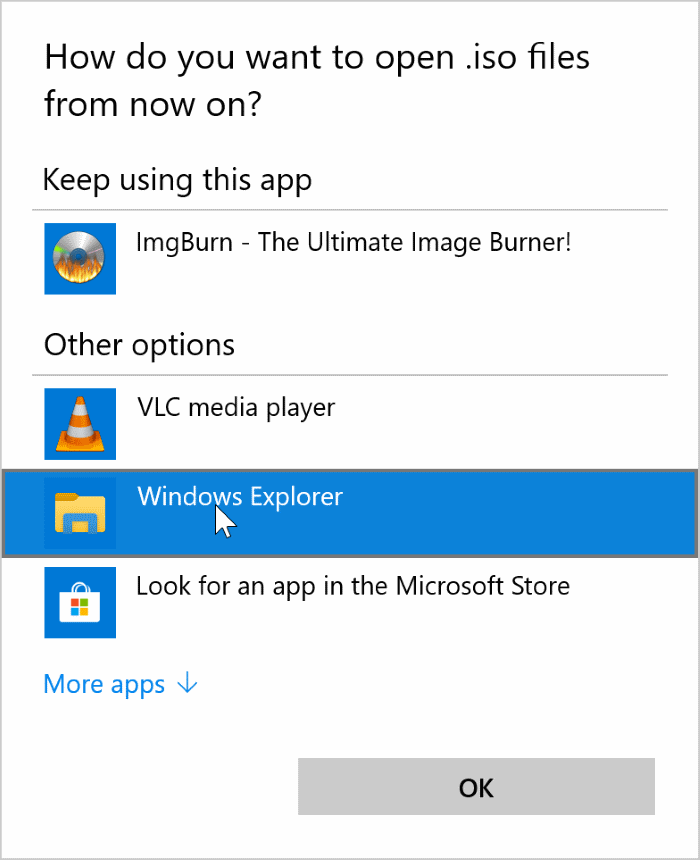
Step 3: Select Windows Explorer from the list. Click the OK button. Click the Apply button the Properties dialog. That’s it! If you cannot see the Windows Explorer entry, click the More apps link.
Right-clicking on the ISO/IMG file should now display the Mount option.
Method 2 of 3
Restore the Mount option in Windows 10 context menu
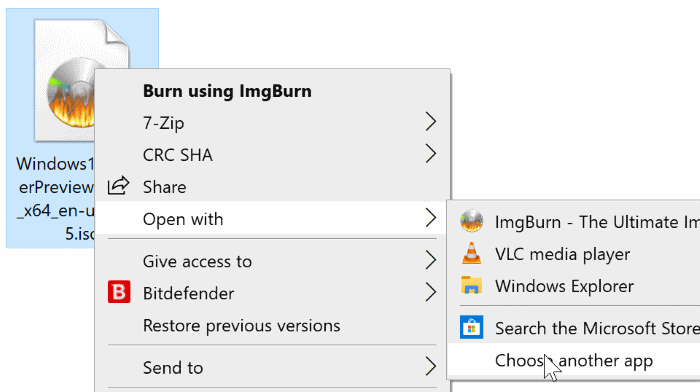
Step 1: Right-click on the ISO/IMG file, select Open with and then click Choose another app option even if Windows Explorer entry shows up in the list.
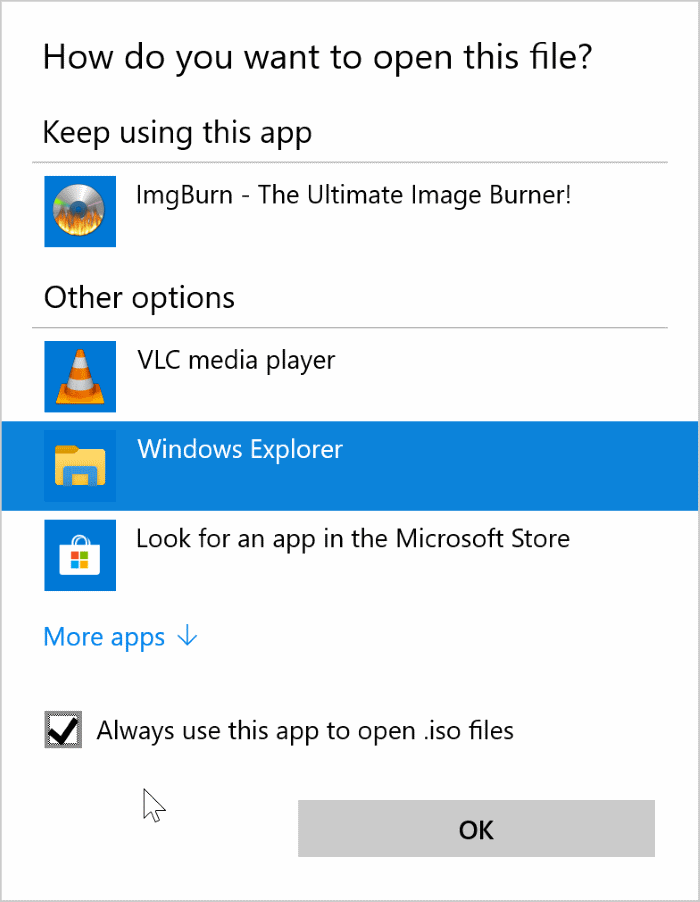
Step 2: Select Windows Explorer from the list, select Always use this app to open ISO/IMG files and then click the OK button.
Method 3 of 3
Restore the missing Mount option in the context menu in Windows 10
Step 1: Open Default Programs. To do so, type Default Programs in the Start menu or the taskbar search box to see Default Programs entry in search results, and click on the desktop version of Default Programs to open the same.

Alternatively, open Control Panel, change the View by to Small icons, and then click Default Programs.
Step 2: Once Default Programs is launched, click the first link labeled Set your default programs.

Step 3: In the following screen, under Programs, select Windows Disc Image Burner, and then click Choose default for this program on the right side.

Step 4: Clicking Choose default for this program will open this screen. Check the option labeled Select All, and then click Save button. That’s it!

You should now be able to see Mount option when you right-click on an ISO or IMG file.